
Ok so this will be a short walk through on creating a RAID array on debian 12 using mdadm. It also applies to Debian 13 and Debian 11, at the very least, as well as most ‘buntus and derivatives You’ll need a computer running Debian, and some disks attached to it. For a mirror, it needs 2 identical drives, and for a raid 5, it needs 3 or more. for raid 6, it needs 4 or more, all identical. Each RAID level above RAID 1 is a form of striping, a mirror being RAID 1, and RAID 0 consisting of 2 disks stuck together in one volume, which guarantees that if one disk dies, you lose all your data. No thanks. I will be walking through creating a RAID 1, a RAID 5, and a RAID 6. I will do a separate thing on zfs, as used on Continuum, but who knows when that will be.
Let’s start at the beginning, after booting your system login as your normal user, and run lsblk:
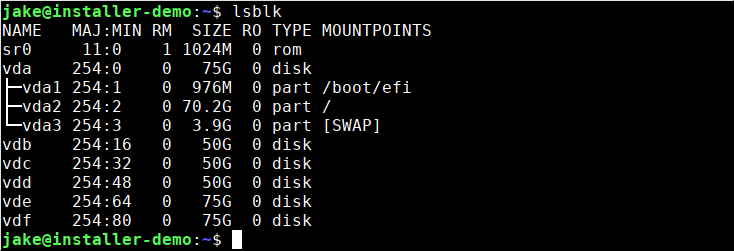
as shown above, you can see that vda is your boot disk, in this case divided into 3 partitions, /, /boot/efi, and the swap partition. your distro may use a swap file, or you may be insane and think you don’t need swap, so what you see there may vary. Also, you may have customized the layout or created partitions for /var, tmp, /usr and /home at install time. I don’t know. This is my demo machine. Anyway we’ll start with the mirror, so you can see there are 2 unpartitioned 75G disks, vde and vdf. These will be the disks we’ll be using for the mirror.
I’m going to create partitions in all the pertinent disks, then create the array using those partitions. Using the disk itself does not work, and will fail. Don’t do that. This applies to all array types as far as I am aware.
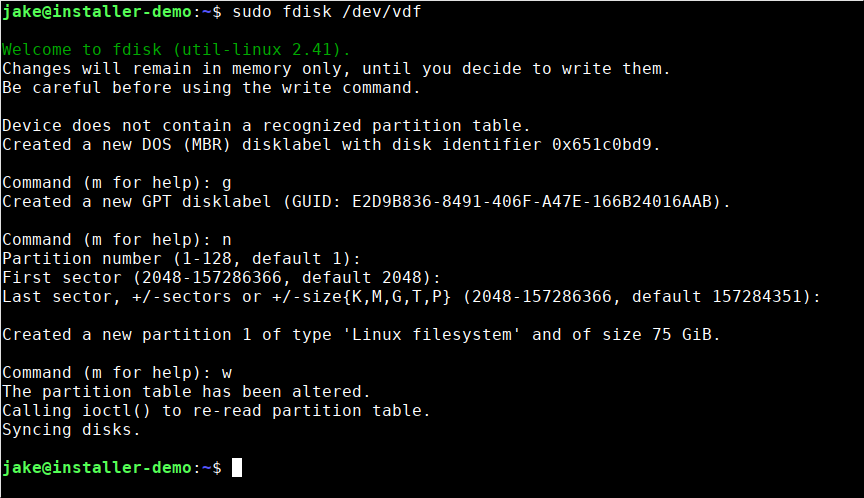
Start fdisk using the first disk you want in your array:
sudo fdisk /dev/<disk>
You’ll see the following prompt. You enter “g” to create a new partition table. it will just go create it, then come back to the prompt. hit “n” to create a new partition. It will ask a few questions, take the defaults. After it creates the partition it will come back to the prompt. Enter “w” (for write), and it will write the partition to the disk.
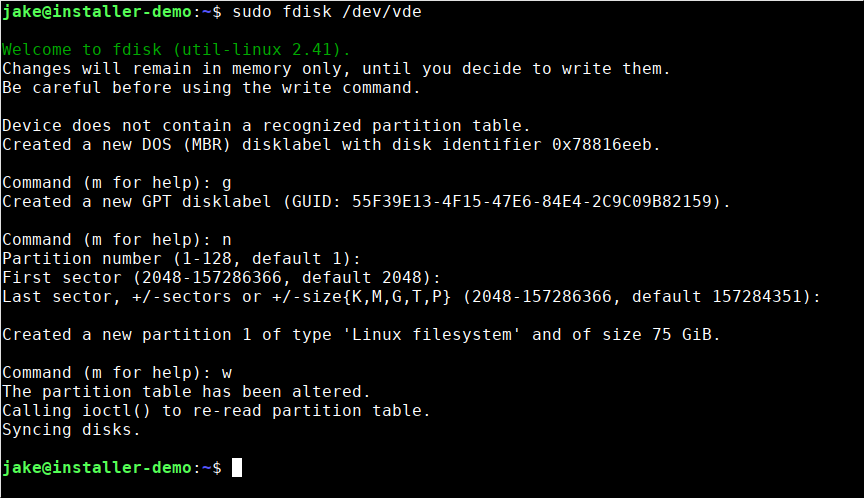
Do the same for the second disk in the array, in this case, /dev/vdf, and now your disks are ready.
Continue with every disk you plan to use in your array. When you have created all the partitions, you’re ready to create the RAID array. In a mirror, one disk is an exact copy of the other. this doubles read speeds, and halves write speeds. All RAID levels have trade offs for reads and writes and storage used. I tend to gravitate to RAID 5 on arrays with disks =< 2tb or if i have 3 disks in the array, and with larger or more disks go with raid 6. Anyway, Lets create the array:
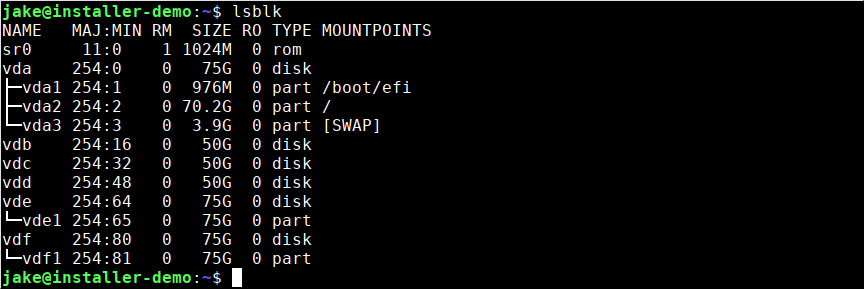
Run lsblk again, this will show the newly created partitions under vde and vdf:
First, if you installed Debian the way I do, install mdadm using sudo apt install mdadm:
Now that is done, we can create the array.
Creating a Mirror (RAID 1)
Enter sudo mdadm --create /dev/<arrayname> --level=<raid level> --raid-devices=<numofdevices> /dev/<part1> /dev/<part2>. Remember to replace anything in<>with your own values. in the case of a Mirror, the level is 1 and the num devices is always 2. I make <arrayname> md<num> where num is the new total number of mirrors

Hit Y twice. This will create a RAID 1. Congrats! You have storage redundancy! you can see the new mirror in lsblk as md0 listed under both disks. now one disk can die and you won’t lose your stuff.
Creating a RAID 5
In our initial lsblk, we identified the disks we are going to use. To create the RAID 5, we are going to use vdb, vdc, and vdd:
The command for creating a RAID 5 is very similar to a mirror:
Enter sudo mdadm --create /dev/<arrayname> --level=<raid level> --raid-devices=<numofdevices> /dev/<part1> /dev/<part2>. Remember to replace anything in<>with your own values. in the case of a RAID 5, the level is 5 and the num devices is the number of disks in the array. Also remember to only use the partitions you created with fdisk, otherwise it will fail to be persistent. <arrayname> can be anything, but i use md<num> where num is the total arrays +1.

RAID 6
Exactly the same as RAID 5, but with a minumum of 4 disks, and level=6.
Making Your Changes Persistent
But you’re not done. if you reboot now, all your work will disappear. So you need to make the array persistent. you will need to use sudo su or su – to become root, then enter the following:
mdadm --detail --scan | tee -a /etc/mdadm/mdadm.conf
This will embed the definition of the array into mdadm.conf. Next step is to regenerate initramfs so it incorporates the new array definition into system startup.

From this point you can either create a fileystem right on the array, or using LVM to create a managed Volume.